
Whether Santa’s brought you a new mirrorless camera for Christmas or you’re simply looking for a photography project you can do at home in the warm, the holiday season is the perfect excuse to indulge in a little food photography. After all, you shouldn’t have to look far to find an assortment of festive props and treats that you can use to compile a photogenic feast.
You don’t need much camera equipment, either. A kit lens and a tripod will stand you in good stead, and if you don’t have a photography lighting kit, then you can rely on diffused window light to get the job done. So, while the family settles down to watch Home Alone for the 50th time, grab your camera, tripod, and a few treats to photograph a festive feast.
1. Set the table

Diffused or indirect window light is a great way to illuminate food photography. If the light is lacking, consider illuminating your setup with an LED panel or even a household lamp. You could also use a reflector to bounce the natural light back onto the arrangement to fill shadows.
Begin by setting up empty plates and adding a few Christmas decorations to ‘sketch’ your composition without spoiling the food. I laid a tablecloth partially across the wooden table to provide multiple textures to add interest to the image.
2. Use a tripod and get the right lens

Food shots hinge on the arrangement. I put my camera on a tripod to roughly gauge the framing and keep it consistent, while I tweaked the arrangement of the food. If you’re shooting a static food display, use Exposure Delay Mode to avoid camera shake and mirror slap.
If you’re capturing movement, like pouring cream or a dusting of flour, a remote shutter release and burst mode is preferred. I used the Nikon Z 35mm f/1.8 S, but a ‘nifty fifty’ is a great alternative, like my DSLR-friendly Nkon AF-S 50mm f/1.4G ED. A kit lens would work well, too.
3. Add the figgy pudding

Once you’ve put together a rough layout and framed a rudimentary composition, you can begin to add in cold food items. If you’re photographing food that’s still cooking, try using similar-sized props in its stead so it doesn't cool or it spoils before you have time to photograph it.
I elected to keep my figgy pudding in its tub – before heating – so there was no danger of it collapsing while I moved items around and refined my composition. Try not to make your arrangement look too uniform; it should resemble a real Christmas spread that invites the viewer to sit at the table. Framing a chair or two will reinforce this.
4. Big up your bokeh

The festive season gives you an excellent excuse to add lots of bokeh to the background of your food shots. I put a Christmas tree behind my spread and opted for a simple string of white lights, so as not to distract too much from the food.
There are myriad of ways to increase the size of the bokeh: a wider aperture, longer focal length, physically moving the tree further back, or placing the camera closer to the point of focus. But bigger doesn’t always mean better. If the bokeh is too intrusive, it may detract from the subject.
5. Dial in your camera settings
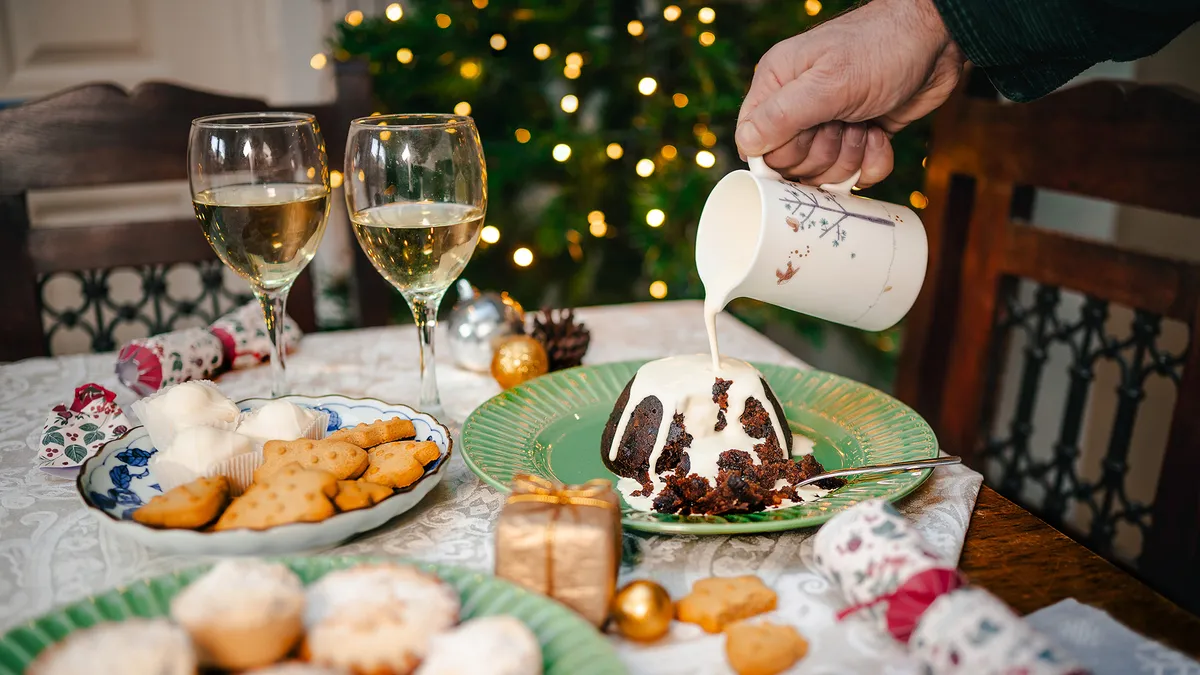
I used single-point AF to focus on the figgy pudding. If you’re shooting a completely static food display, you can select your base ISO and dial in any shutter speed to compensate. I captured a hand pouring cream over my pudding and settled on 1/100 sec to freeze the movement, requiring me to up my ISO to 200.
I found that my Nikon's Flash white balance preset provided a neutral color temperature, which I could then tweak in post-production. Being able to freely alter white balance is one of many reasons why shooting RAW is always preferred.
6. Christmas color grading

Color grading allowed me to tweak individual colors within my image. After inputting general tonal edits in Adobe Lightroom Classic, I added magenta (+4) via the Tint slider and then headed into the Color Mixer’s Hue panel. I increased the intensity of Greens (+35), added red to Yellows (-20) and Oranges (-12), while using the Saturation panel to boost Reds, Oranges and Greens. I then used the Color Grading panel to add red to Midtones, orange to Highlights and blue to Shadows. Reds and greens really add to the festive vibe.
Quick tip: Photograph a flaming figgy pudding

After you’ve shot your festive spread, try capturing some frame-filling close-ups. My flaming figgy pud was shot with the Nikon Z 70-200mm f/2.8 VR S. Place the pud against a dark background to make the flames really pop and set your camera on a tripod. Use single-point AF to focus on the pudding and switch to manual focus to prevent hunting.
The flames burn brightest as soon as the pudding is lit, so enlist a friend to light it while you fire off a high-speed burst. I used 1/125 sec to freeze the flickering flames and a wide-open aperture to separate the pudding from the background. Always take great care when lighting a Christmas pudding – adult supervision is essential.
You may also like...
Got a new camera for Christmas? Here are my 10 expert tips for getting to grips with it fast! If you're looking for another festive photography project, I made these fun custom bokeh shapes for my Christmas photography on a shoestring budget. And if you're looking for something interactive, check out my photography general-knowledge quiz.

You must confirm your public display name before commenting
Please logout and then login again, you will then be prompted to enter your display name.
